A digital avatar: how to make content without filming anything
Somebody sent three ordinary phone photos. Out came a studio frame, three angles of one scene and a video where she talks to camera. No studio, no lighting, no camera operator and no person on set. Below is the whole route step by step, in ten minutes.
Somebody sent three ordinary phone photos. Out came a studio frame, three angles of one scene and a video where she talks to camera. No studio, no lighting, no camera operator and no person on set. Below is the whole route step by step, in ten minutes.
---
If there is no time to read: five steps
1. You need three or four photos of the person from different angles. Ordinary phone ones.
2. The character sheet comes first — a page with every angle of the face. That is the foundation everything is built from.
3. Do not write the prompts. There are ready assistants you dictate the task to in words.
4. Any scene gets assembled from the sheet — a studio, an interior, a street. After that only the camera angle changes.
5. The frame comes to life as video through a second assistant and the generation section. The whole route takes about ten minutes.
---
What one shoot usually consists of
Count up what it takes to get five minutes of a person talking on camera.
A location — a studio or a room that has to be found and paid for. Lighting — at least three sources and somebody who knows how to set them. A camera and an operator. A make-up artist if the face will be in close-up. The person themselves, who needs a free day and the right mood. Then the editing.
And all of it for one clip. Need a second one with a different line and the cycle repeats in full.
So regular video content belongs to those who can afford a shooting day once a month. Everybody else sticks to text.
There is another route: three ordinary photographs in — and after that as many frames and clips as you like, with no set and no person present. Below it is worked through completely, on a real run.
And yes, the same route works for a present — a portrait the person does not have, assembled from photographs already sitting in your messages. But that is only one use, and the simplest.
---
Who I am and which avatar I built
I have been working with AI for five years, since 2019.
The breakdown below is a real run rather than a textbook example. A woman sent three photographs of herself; I show everything I did next, with links to each result. You see exactly what I saw.
The final video we arrive at speaks for itself — literally: the person in the frame explains that content for a business can be made this way with no location hire, no model and no actual filming.
---
Step 1. Three source photos
Here is what came in — ordinary photographs, not studio ones:
The first · the second · the third
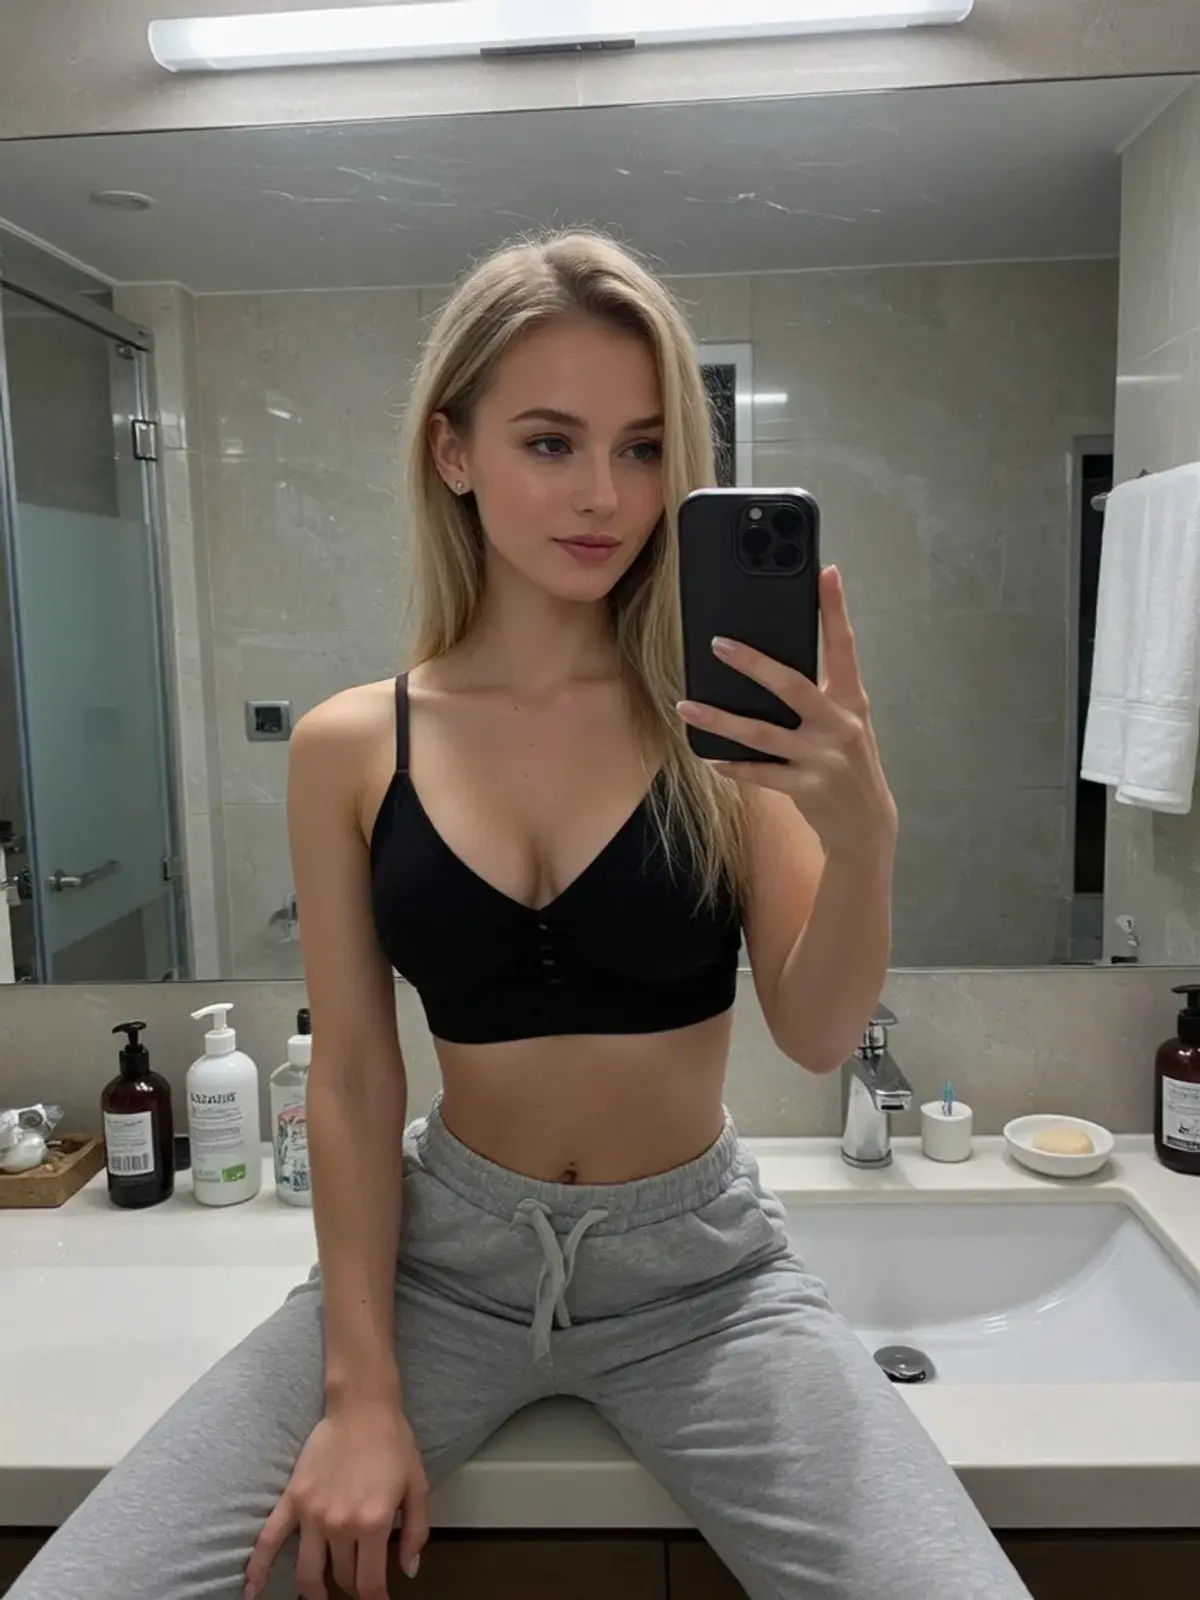
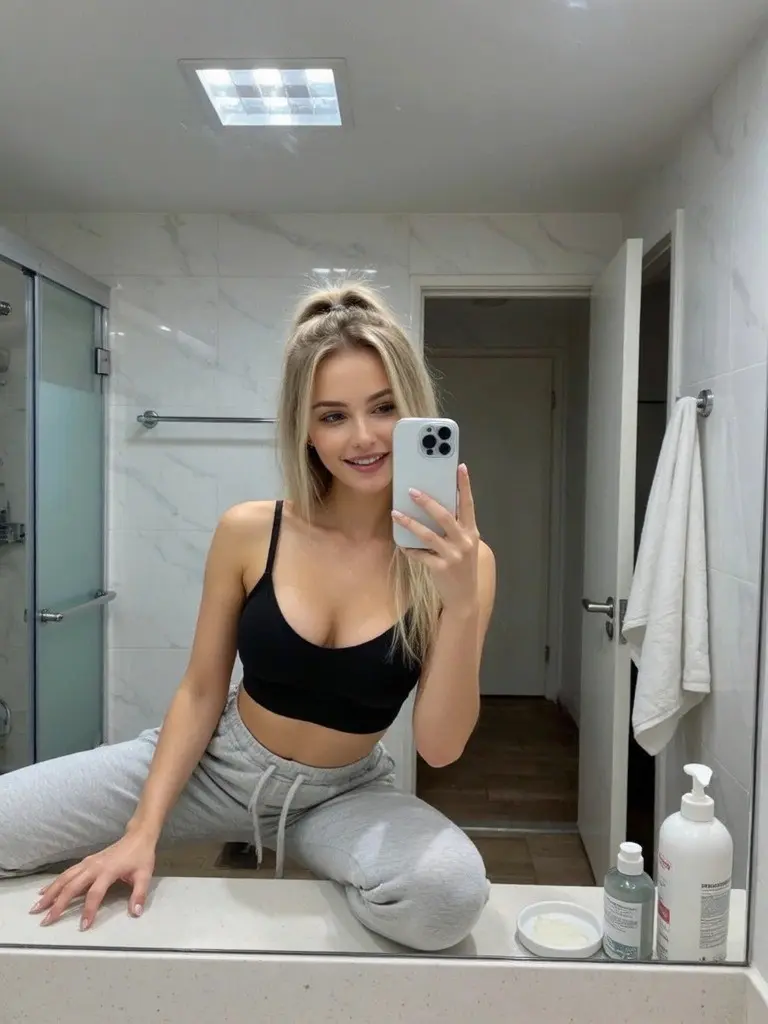
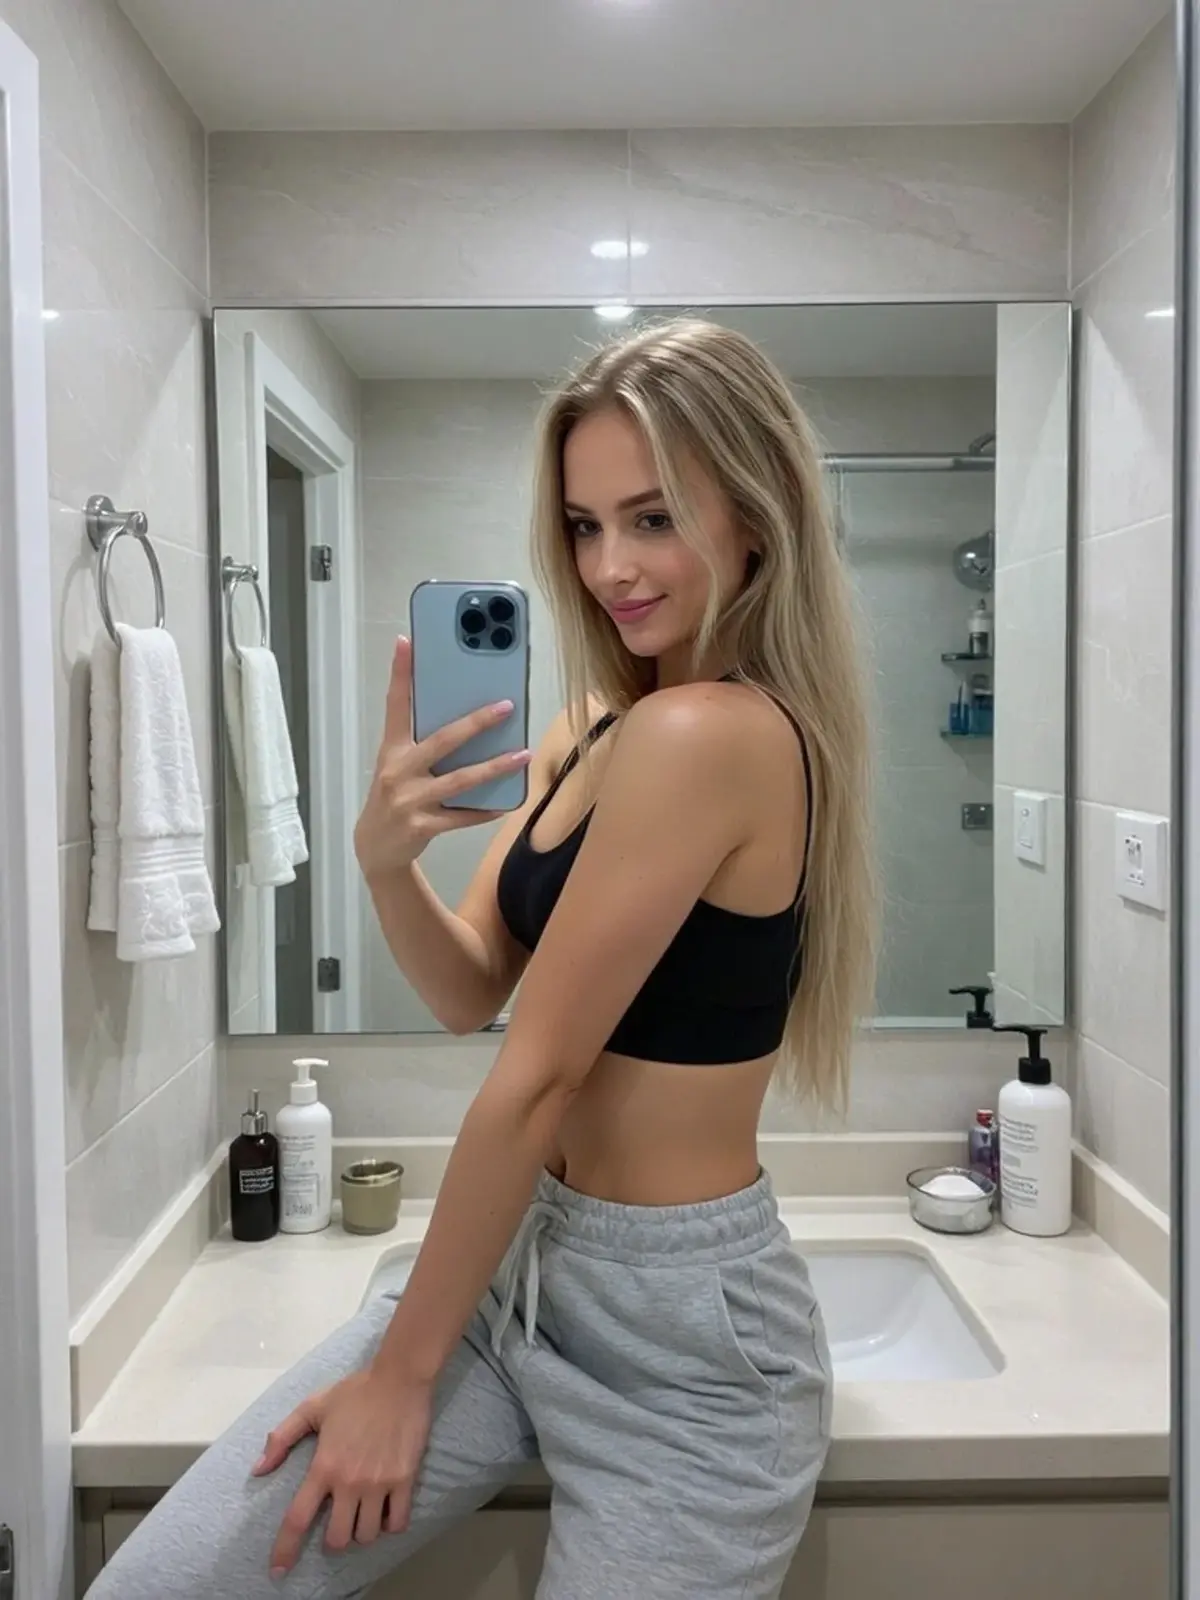
What to ask the person for. Different angles: full face, three-quarters, full length. Even light with no harsh shadows. The face not obscured.
How to get them without making a thing of it. Usually "send me a couple of your photos, I want to print one" is enough — or take them from a shared conversation if they are there.
---
Step 2. The character sheet
The first thing made is not a portrait but the foundation.
I opened the "Nano Banana prompts" assistant from the "Creative" section and dictated the task by voice: I need a character sheet, three strips, portraits from various sides, the figure full length, the same face in every frame, visible skin texture, no retouching.
It assembled the technical text with all the angles in degrees and a lighting scheme. I did not write it — I explained the task in words.
The result — a character sheet
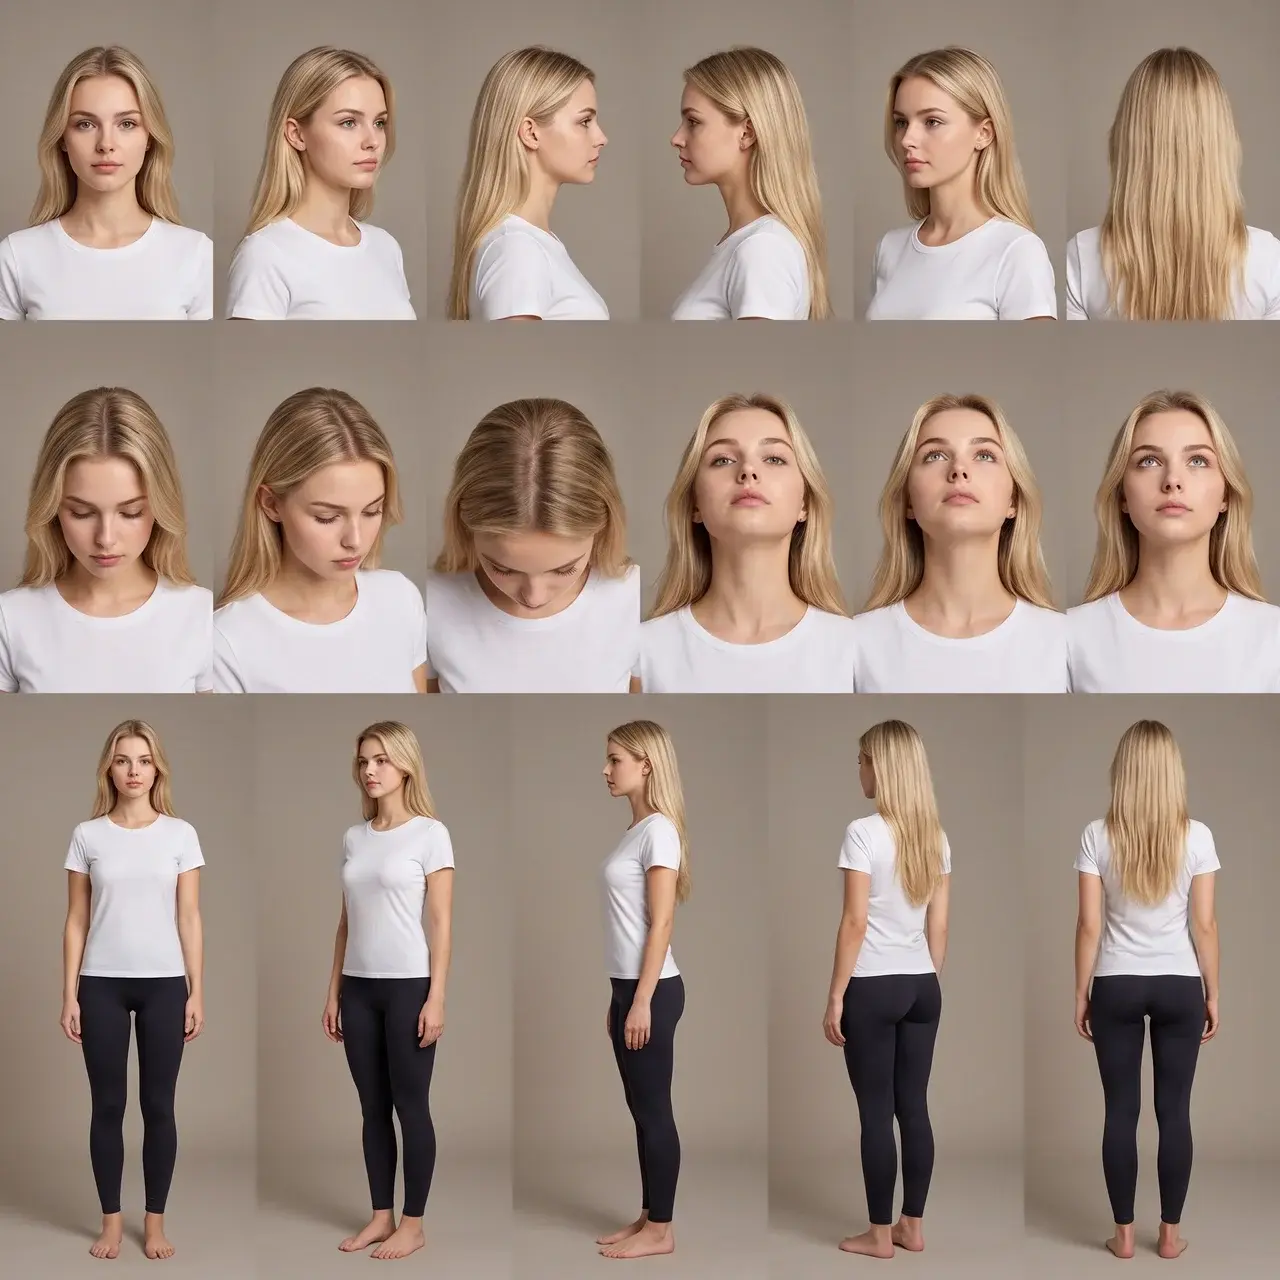
Why this step. The sheet is not the present but the foundation. From then on, in any scene the appearance is taken from here rather than invented afresh. That is exactly why every frame that follows shows the same person.
---
Step 3. A frame in a scene
Now the frame can be built. I went back to the same assistant and asked for a prompt for a specific scene — an expert's studio.
Out came a detailed text: a modern media studio with subdued light, the person sitting on a chair, leaning slightly forward, gesturing as she talks. A condenser microphone on a boom, a laptop with charts, an open notebook. A three-point lighting scheme — key, fill and backlight. An 85 mm lens, shallow depth of field, a blurred background. And a separate line tying the appearance to the sheet.
The result
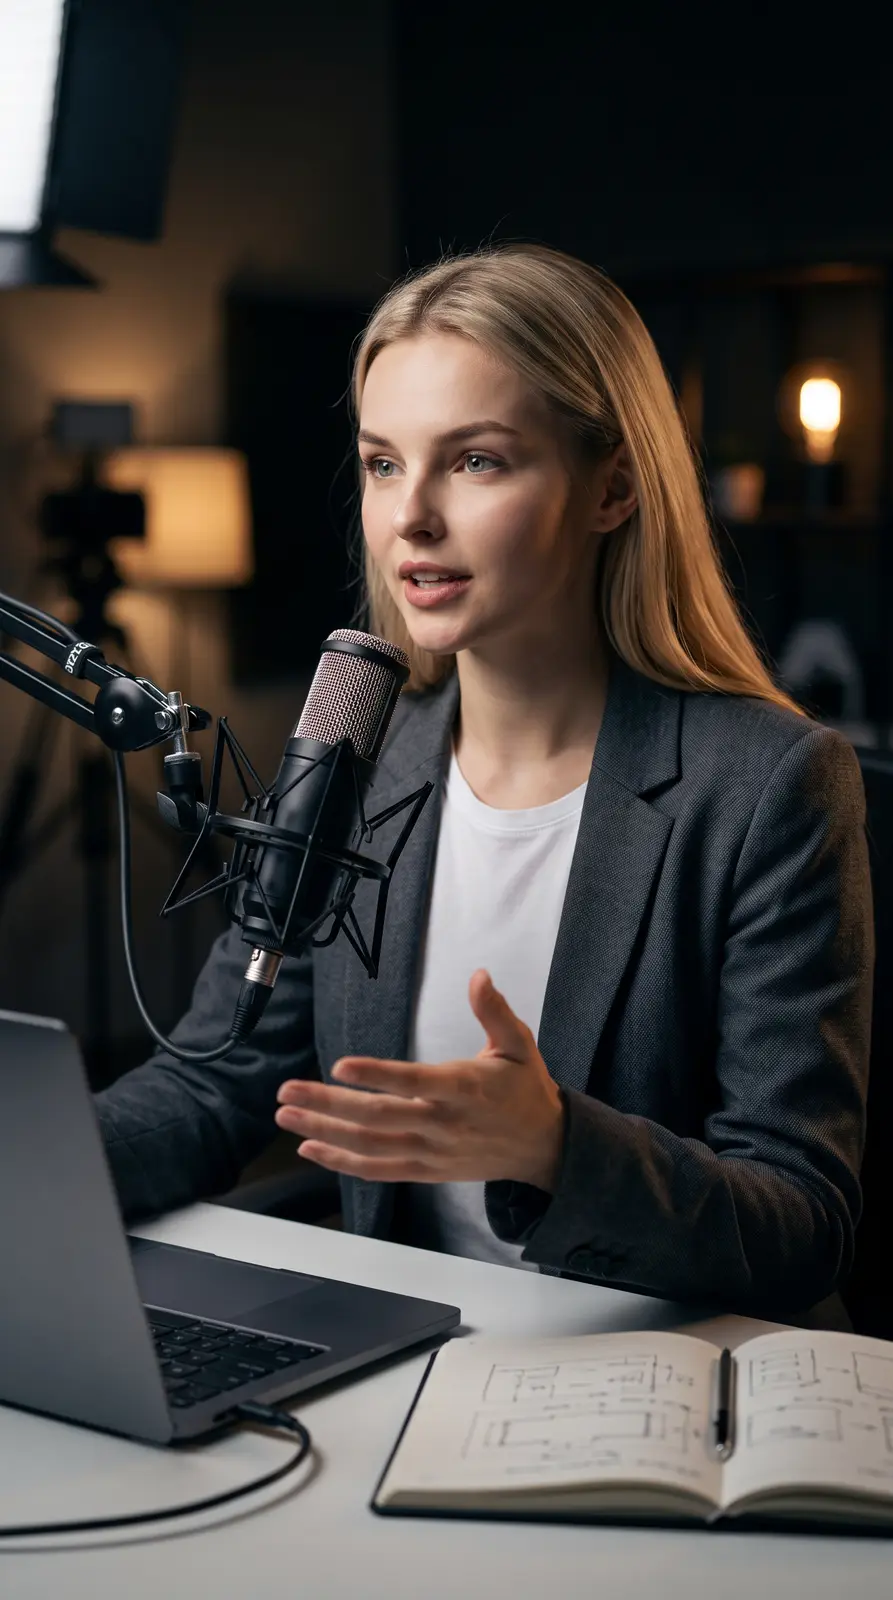
What matters here. I did not think about 85 mm, three-point lighting or shallow depth of field. I said "an expert's studio" — the camera decisions were chosen by the assistant. It is the art director who knows what a frame like that consists of.
---
Step 4. The same scene from other angles
One photograph is one photograph. A series from several angles looks like a real shoot.
I took the finished portrait, went back to the assistant and asked for prompts to change the camera angle. The same scene, the same light, the same person — only the viewpoint changes.
The second angle · the third angle
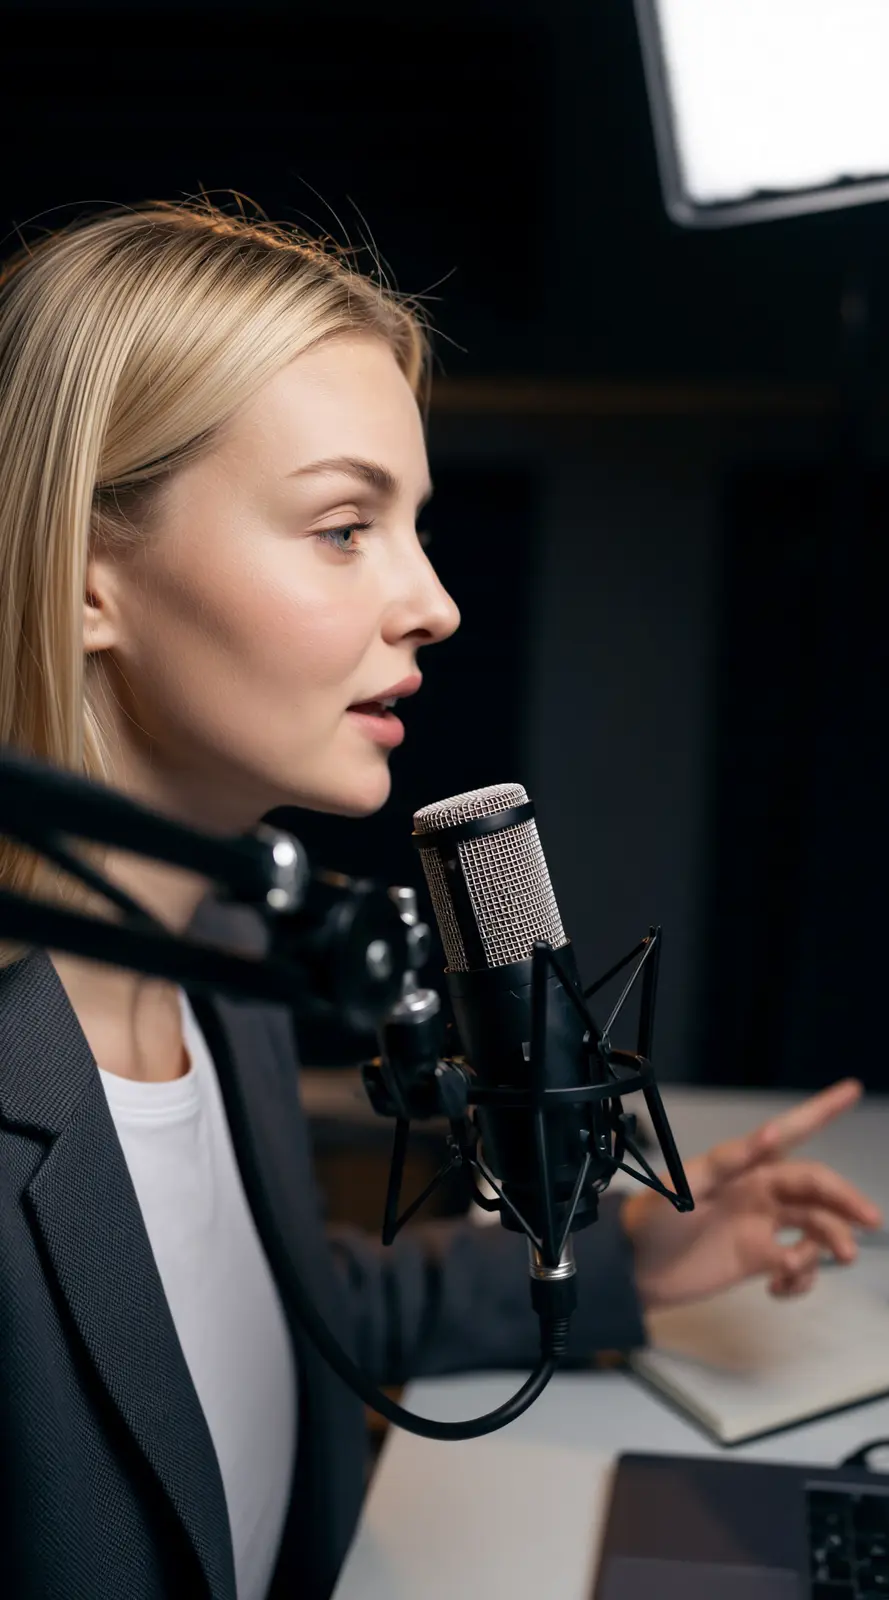
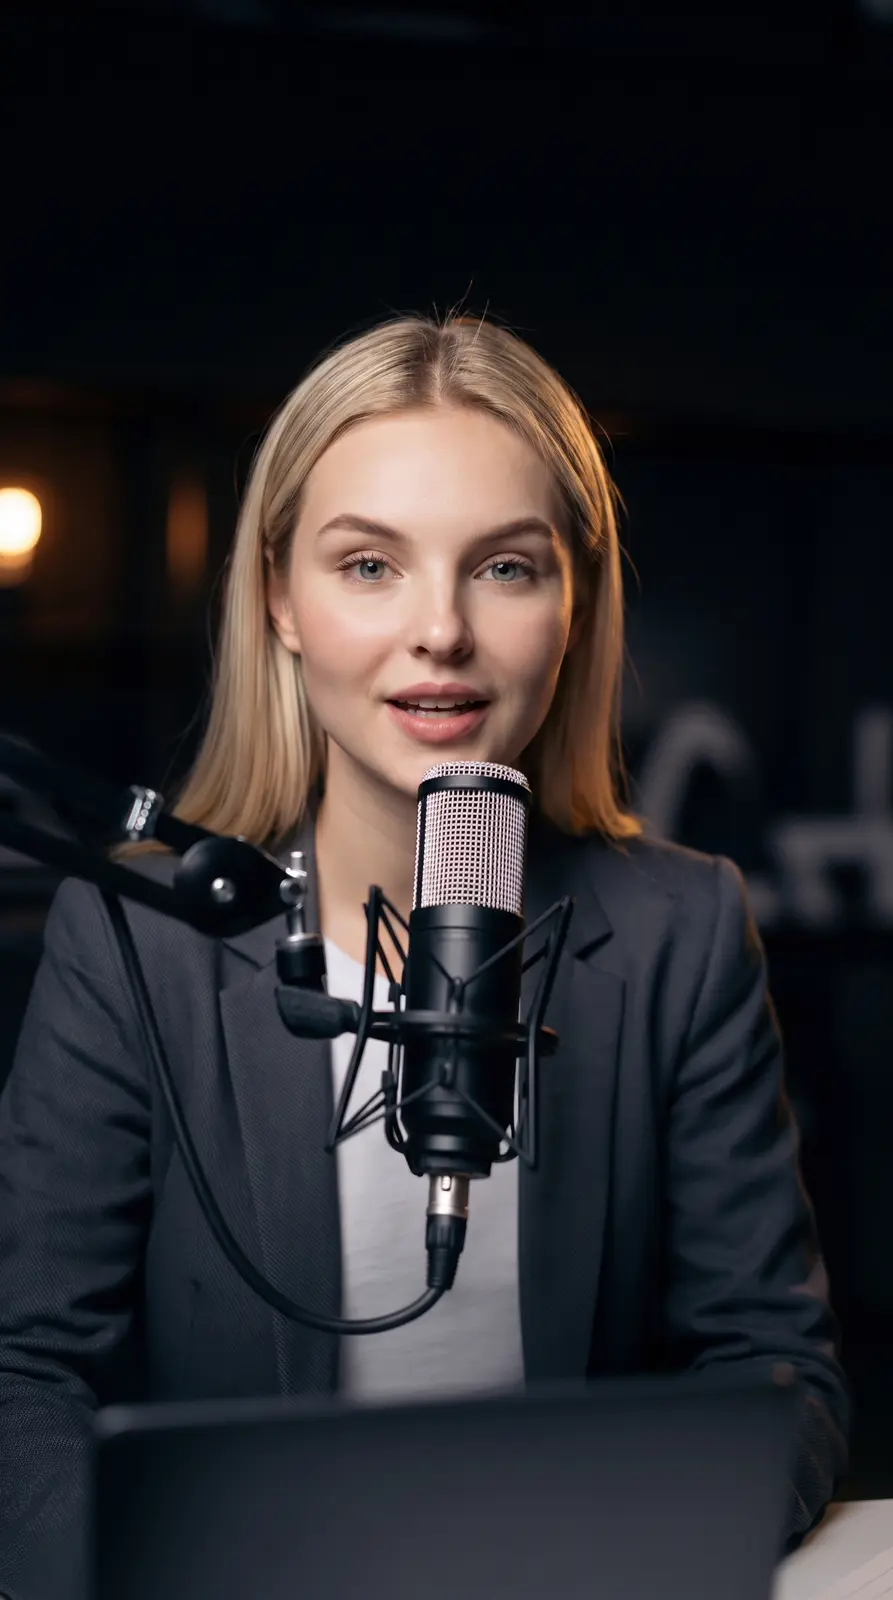
Three frames of one scene is no longer a picture but a small shoot.
---
Step 5. The frame starts to talk
Here the still stops being still.
I moved to another assistant — "Seedance prompts" — gave it each image separately and asked for a prompt for a video in which the person says a specific line.
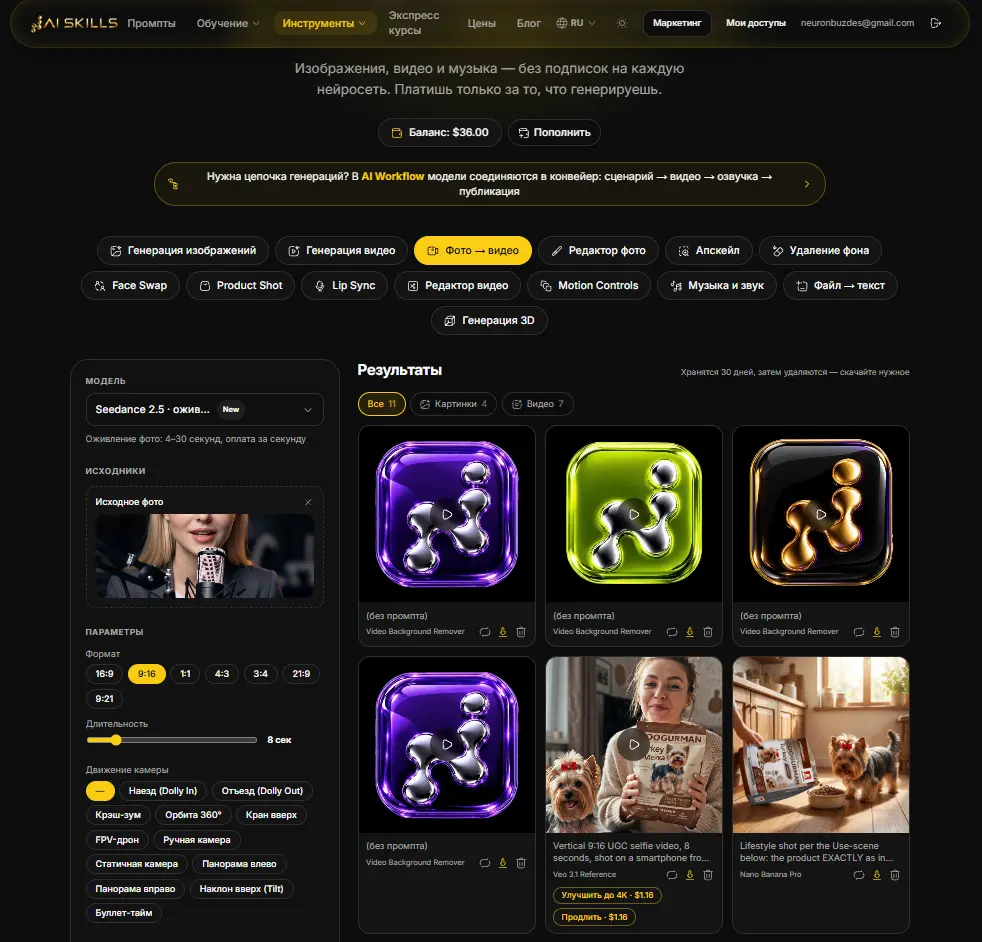
Then the generation section, the "Photo to video" mode, the Seedance model. VEO also suits.
Three videos from three angles
And the finish: a couple of minutes in the free CapCut on a phone — joining the three angles into one clip.
The finished result
---
What to do if the avatar came out wrong
The face is similar but not right. Too few sources. Add angles you did not have: profile, the face close up in three-quarters.
Different frames look like different people. You are generating each one separately, with no sheet. Go back to step 2.
Too smooth, like a magazine cover. Tell the assistant directly: "visible skin texture, no retouching and no make-up".
The video jitters or the face drifts. Usually because there is too much movement in the frame. Ask for the minimum: a slight turn of the head and a hand gesture.
---
Where this leads next
One clip is the first task. Then begins what many people come here for.
#### A digital avatar
A sheet holds the likeness within one session. The next rung is a trained character: you upload 15–20 photographs with no retouching, from different angles, in daylight, and get a model that generates that specific person for months, across any number of frames.
That is the avatar that will not drift on the tenth frame or the hundredth.
#### What is in the "Photo and video" block
The largest block of the programme, and it divides in two.
Stills. A full treatment of Midjourney with all its hidden commands: blending images, reverse-engineering other people's pictures, copying a style from a reference, targeted replacement of objects inside a frame, seamless extension of the borders, a library of 5 000+ styles. Separately GPT Images and Nano Banana — hyper-realism with pores and natural imperfections. And Flux, where your own models get trained.
Movement. A motion brush with which you select an area and set its direction separately from the rest of the frame. Keyframes: you upload the first and the last, and the transition is calculated for you. Ready presets of camera moves.
All of it uses the models in the Gen AI section, gathered in one window and paid for from a common balance on usage.
Four mini courses inside the block: Midjourney from beginner to Pro · GPT Images and Nano Banana with the mechanic of character consistency · basic video generation · AI Video: direction and camera control.
---
On editing, separately
In this article I spent two minutes editing in CapCut — simply joining three angles. That is enough for a present.
But if content is needed regularly, editing stops being a matter of joining. The same subscription holds the "Professional video editing" block — over 35 lessons specifically on expert clips. Here is what it covers.
The one-and-a-half to two second rule. The main principle of clips that travel: every 1.5–2 seconds something noticeable should change in frame. If the picture is static for longer than three seconds the eye glazes over and the person swipes. A camera push, a word appearing, footage over the head, an icon — what matters is not which but the frequency.
A timeline of 20–25 seconds. Zero to two seconds — the hook, the most dynamic editing. Two to ten — retention, the pace does not drop. Ten to twenty-five — the substance and the call to action.
The anchor method. Every visual change is justified by the meaning of the speech: said "family" — an icon appears; said "money" — an animation flies in.
The speaker's technical setup before filming. Two light sources — a key at 45 degrees and a rim light from behind and to the side, to separate the silhouette from the background. Half a metre to three metres from the wall for depth, so captions can be placed behind the head later. Half-second pauses at the start and end of a sentence, so there is something to cut on. And an honest caveat: do not rely on AI audio enhancement, it gives a metallic overtone.
Frame-by-frame analyses of other people's editing — creators with large audiences. Not theory but what actually works for people with big reach: texturing objects, directing attention through blur, the contrast of stillness and motion, assembling a scene from separate elements.
Plus separate parts on masks and layers, keyframes and a universal formula for movement, automatic subtitles with the two-word rule, safe zones, colour grading and custom presets, sound design with layers and generated background music, the psychology of the first two seconds with a library of hooks, and hidden details as a retention strategy.
Here is what comes out after that course — compare it with my two-minute join above.
---
What else is in Plus
Three blocks of the programme: "Photo and video", "Professional video editing" and "The automator" — twelve lessons on how to stop doing repetitive things by hand.
Six express courses:
"Midjourney from nothing to control" — access, fundamentals, an advanced level with your own references.
"ChatGPT Images & Nano Banana" — seven chapters from the anatomy of a prompt to branded content with one character across a series.
"Google Veo 3" — commercial video: 1080p, synchronised sound, cinematic control.
"Video AI 2.0" — Kling 3.0 and Seedance 2.0 in full: working with the first and last frame, multi-shot scenes with six angles in one request, replacing background and lighting inside finished video, lip sync.
"Suno" — music generation, three hundred-odd pages: the prompt formula, an atlas of 61 genres, 41 sound profiles, album mode, monetisation.
Plus two general ones — Perplexity and Grok.
---
And if you want no subscriptions at all
A separate story for those who want to put models on their own computer.
The Full plan has the course "Working with AI software" — 36 lessons, over forty hours of material. Installing Stable Diffusion locally and running it in the cloud, how text-to-image and image-to-image work, ControlNet, Inpaint, training your own models, detailing faces, preserving a person's identity between frames, upscaling, volumetric effects, Deforum.
The point is simple: the model runs on your computer, no internet is needed for generation, and there is nothing to pay per request.
---
Where to start today
One action, ten minutes.
Find three photographs of the person you want to make a present for. They are almost certainly in your messages.
Go to the prompt assistant and dictate by voice what you want: a character sheet with every angle. In your own words.
Send the text you get to the generation section.
Did it work? Take a second task. Put the same person into another scene — that is one line of ordinary language.
And if you cannot think of a scene, the art director will produce three ready concepts with location, light, pose and palette.
If you need a permanent character. The separate AI Blogger section trains a character once — after that it does not change appearance from frame to frame. A voice is added there too, and the character starts to speak.
An important detail: checking your photographs there is free and comes before payment. A traffic light with an explanation — red does not let you through, because on a poor set the character will come out permanently artificial. That is, you cannot pay for a failed result.
Registration is free and opens three days of full access to all the assistants.
---
What to read next
[How to give yourself a photo session](/en/blog/photoshoot-without-photographer) — the same mechanics, but for yourself.
[Restoring an old photograph](/en/blog/restore-old-photo) — if the source is damaged.
[Why an AI character looks plastic](/en/blog/why-ai-character-looks-plastic) — five causes of that synthetic look and how each is fixed.
[What an AI blogger earns from](/en/blog/ai-blogger-monetization) — if an avatar grows into a project.
---